How to set up a tarp
How to set up a Tarp
Setting up a tarp teepee
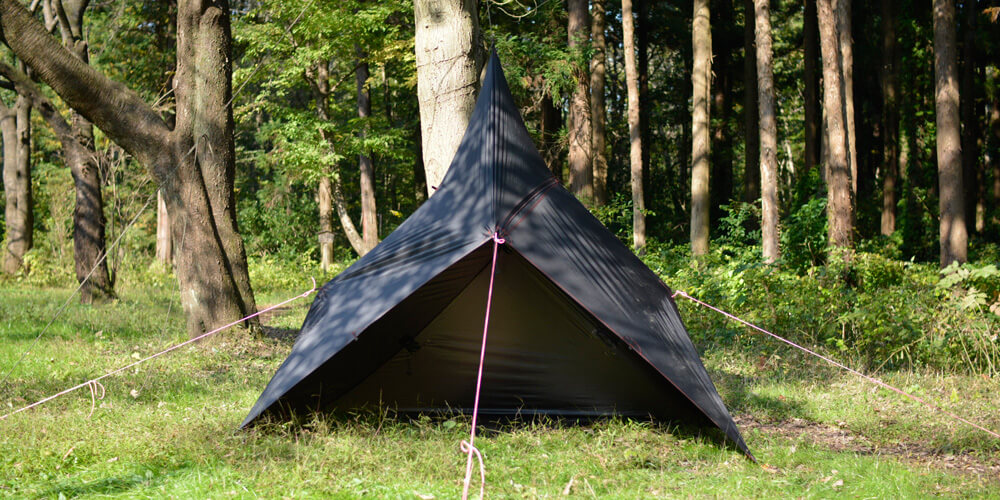
Setting up an A-frame tarp
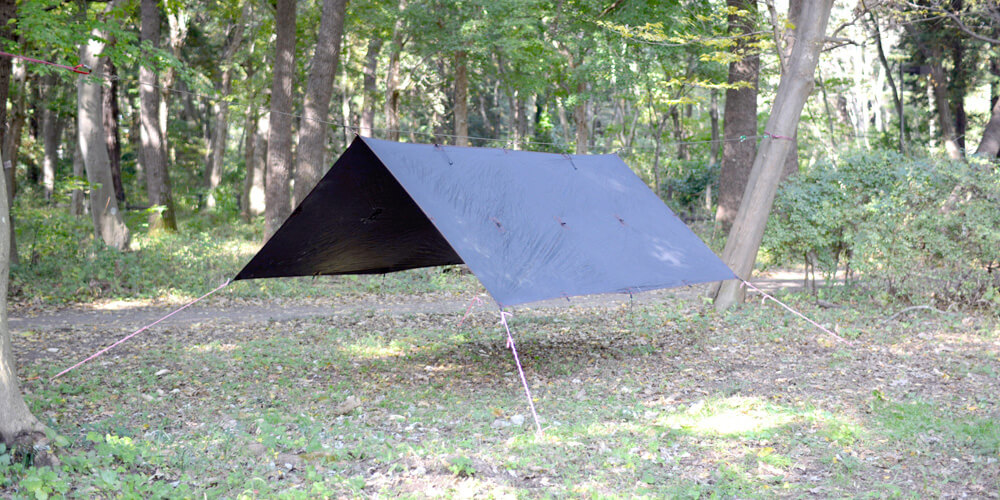
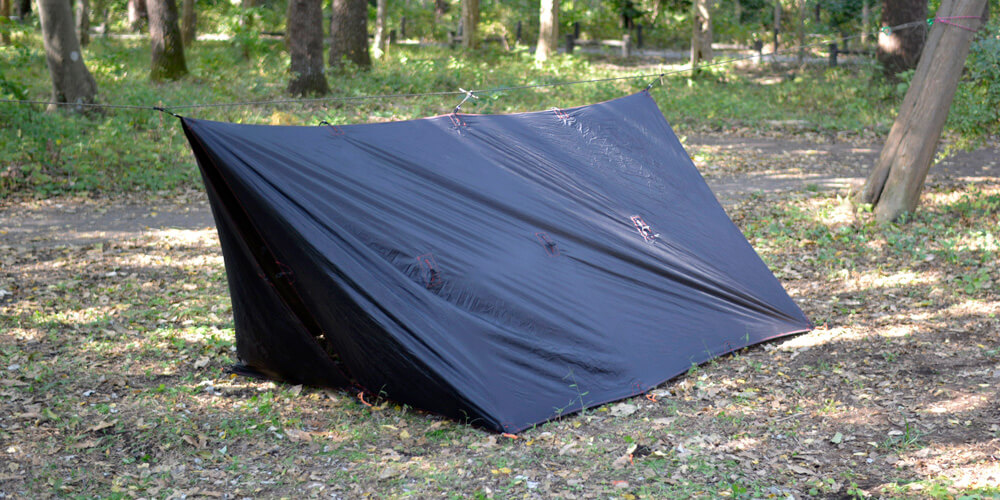
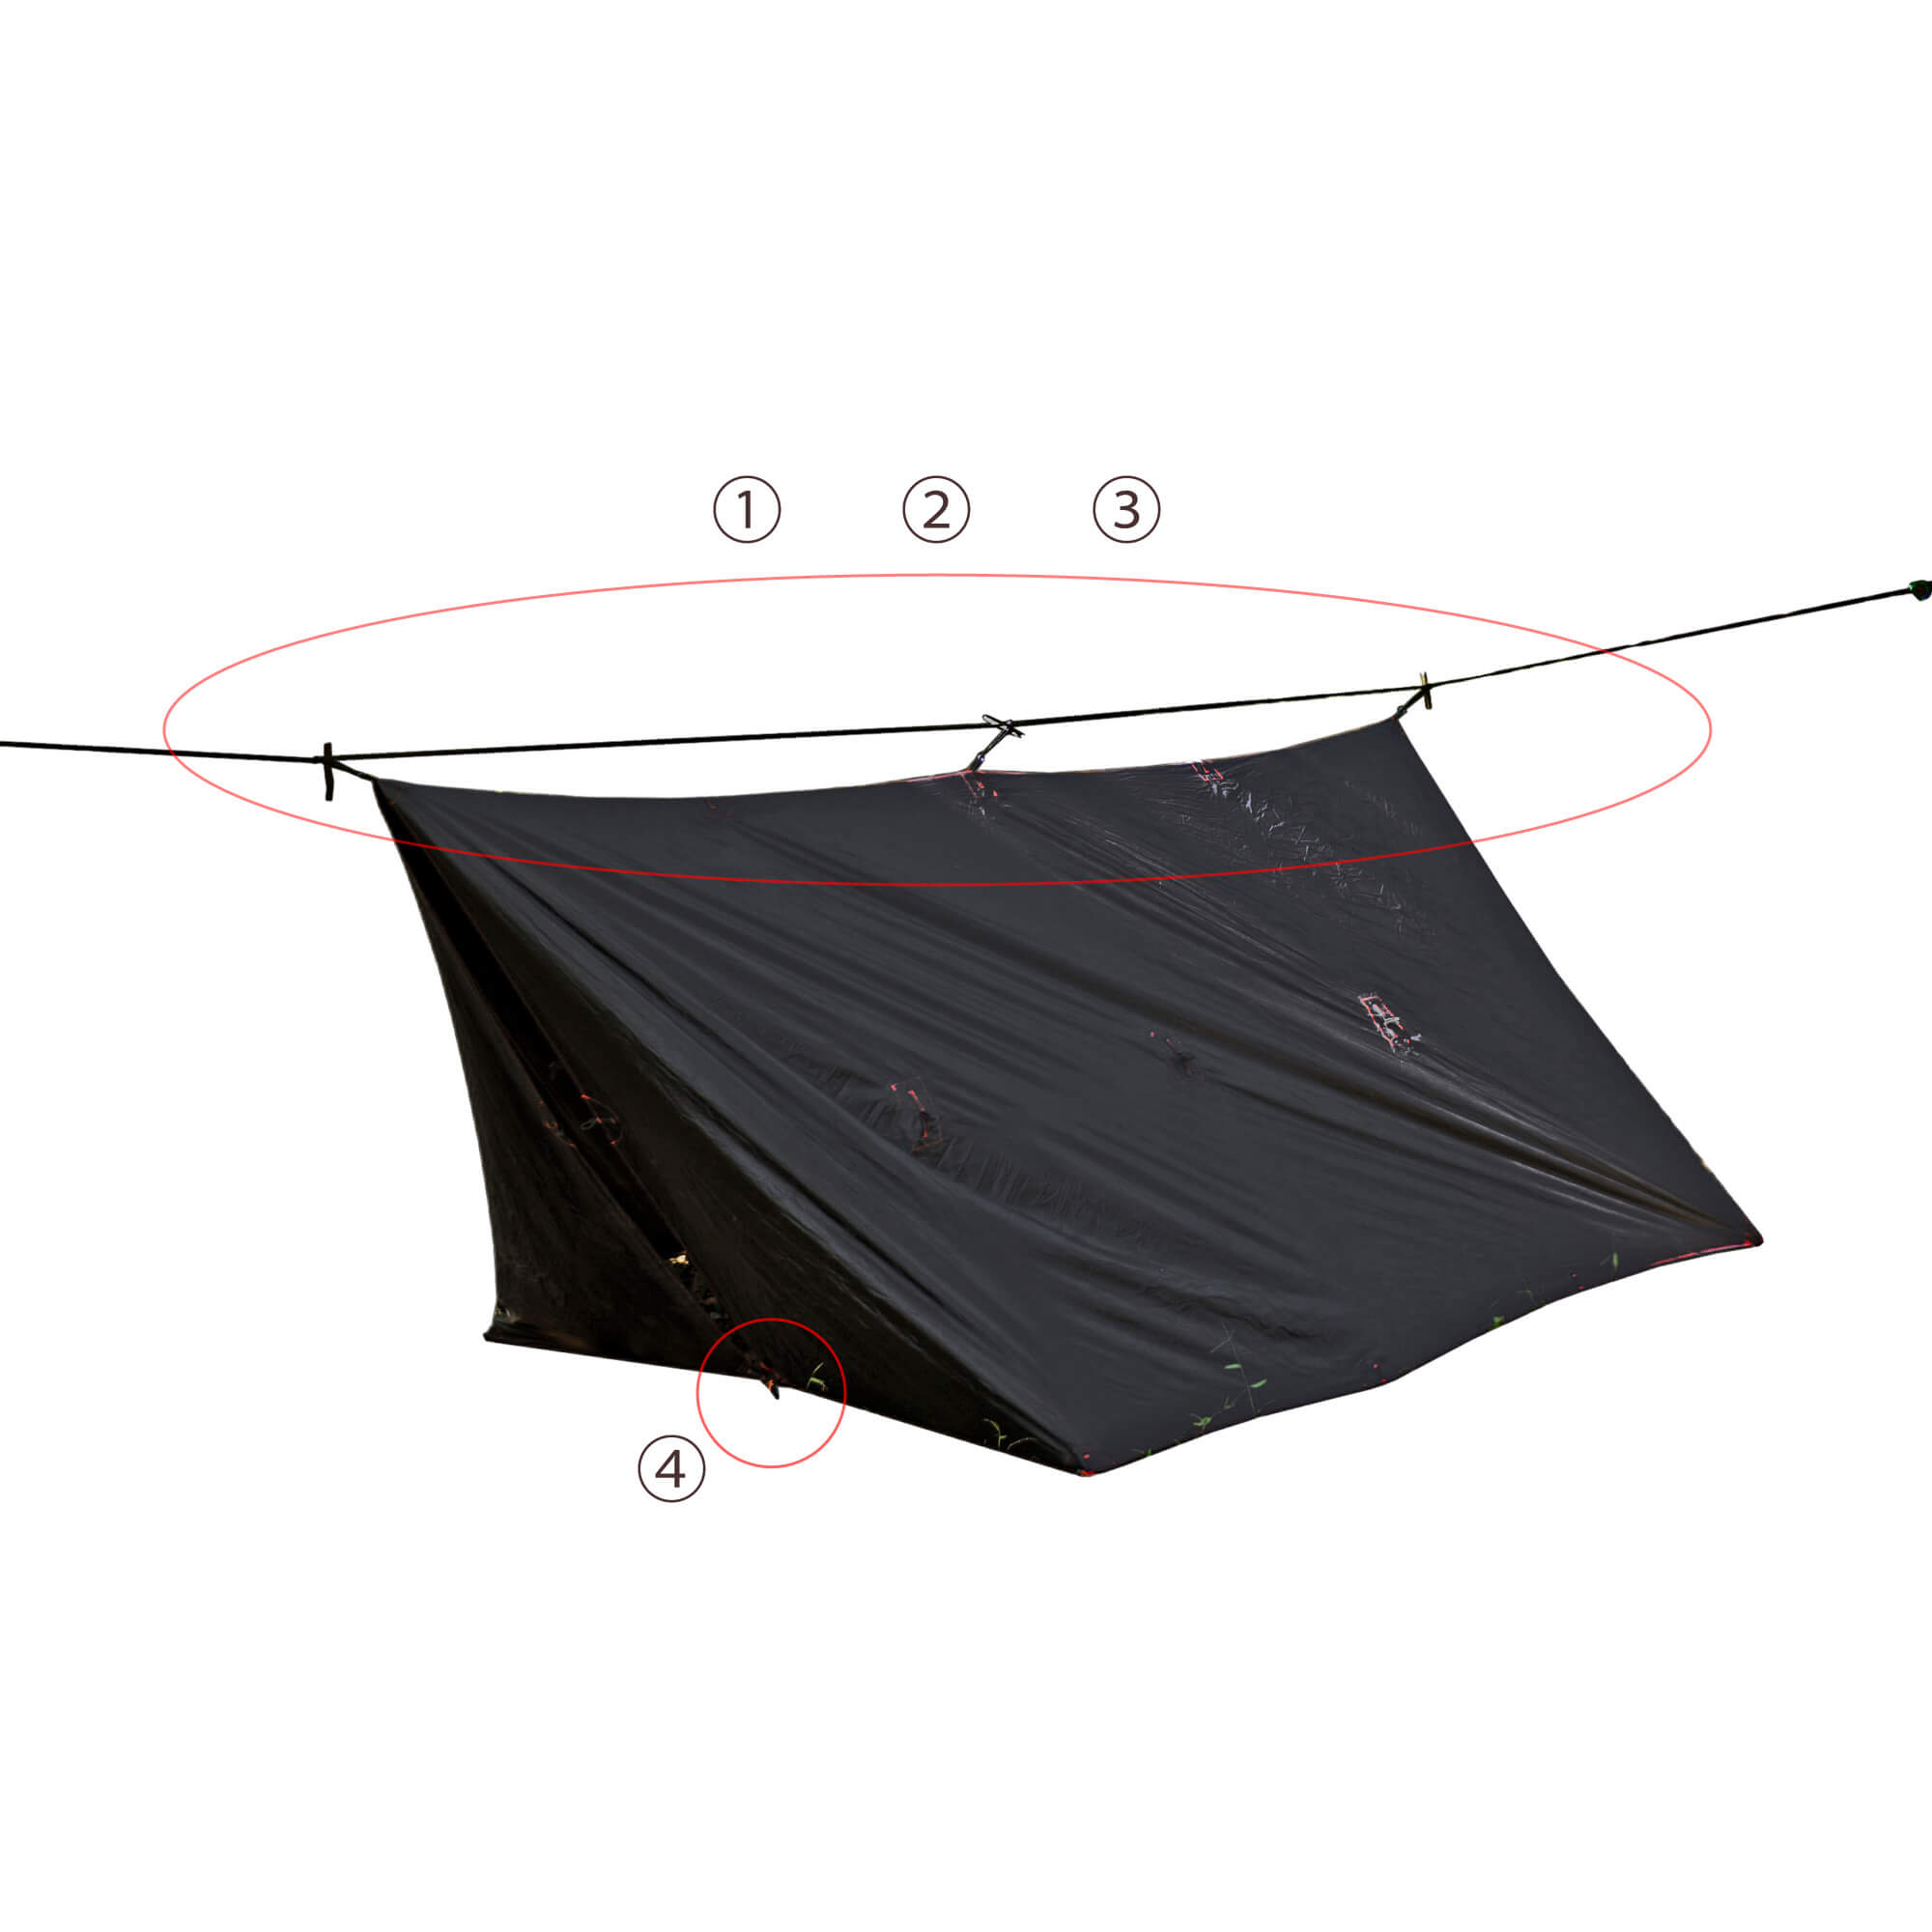
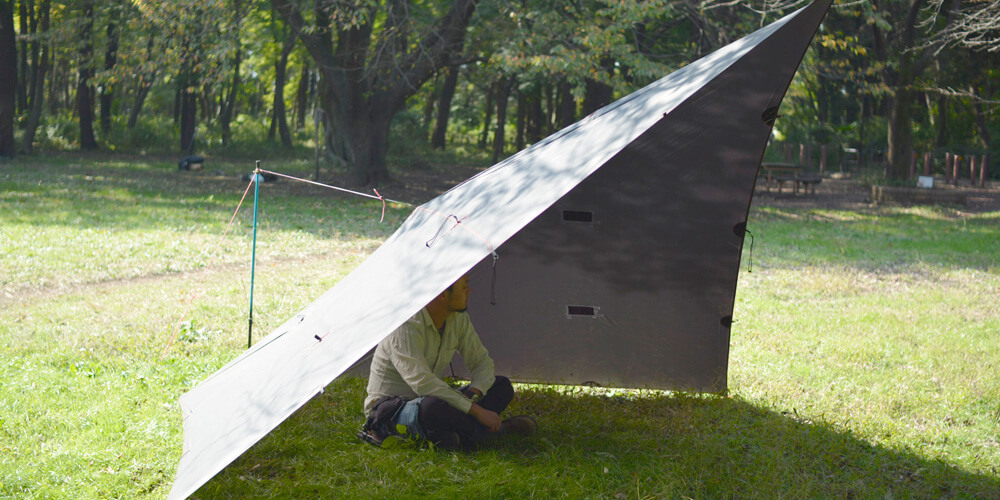
This is the A-frame, which is the basis for setting up a tarp. It is one of the most widely used setups because it has the widest usable area and allows for a high degree of freedom in arrangement. By setting up the ridgeline without using poles, as shown in the photo, you can learn all the ropework required for setting up any type of tarp. It's also nice to roll up one side and enjoy the starry sky while sleeping. In preparation for a sudden change in weather, you can always unfold the roof by pegging down once and adjusting the length of the guy lines.
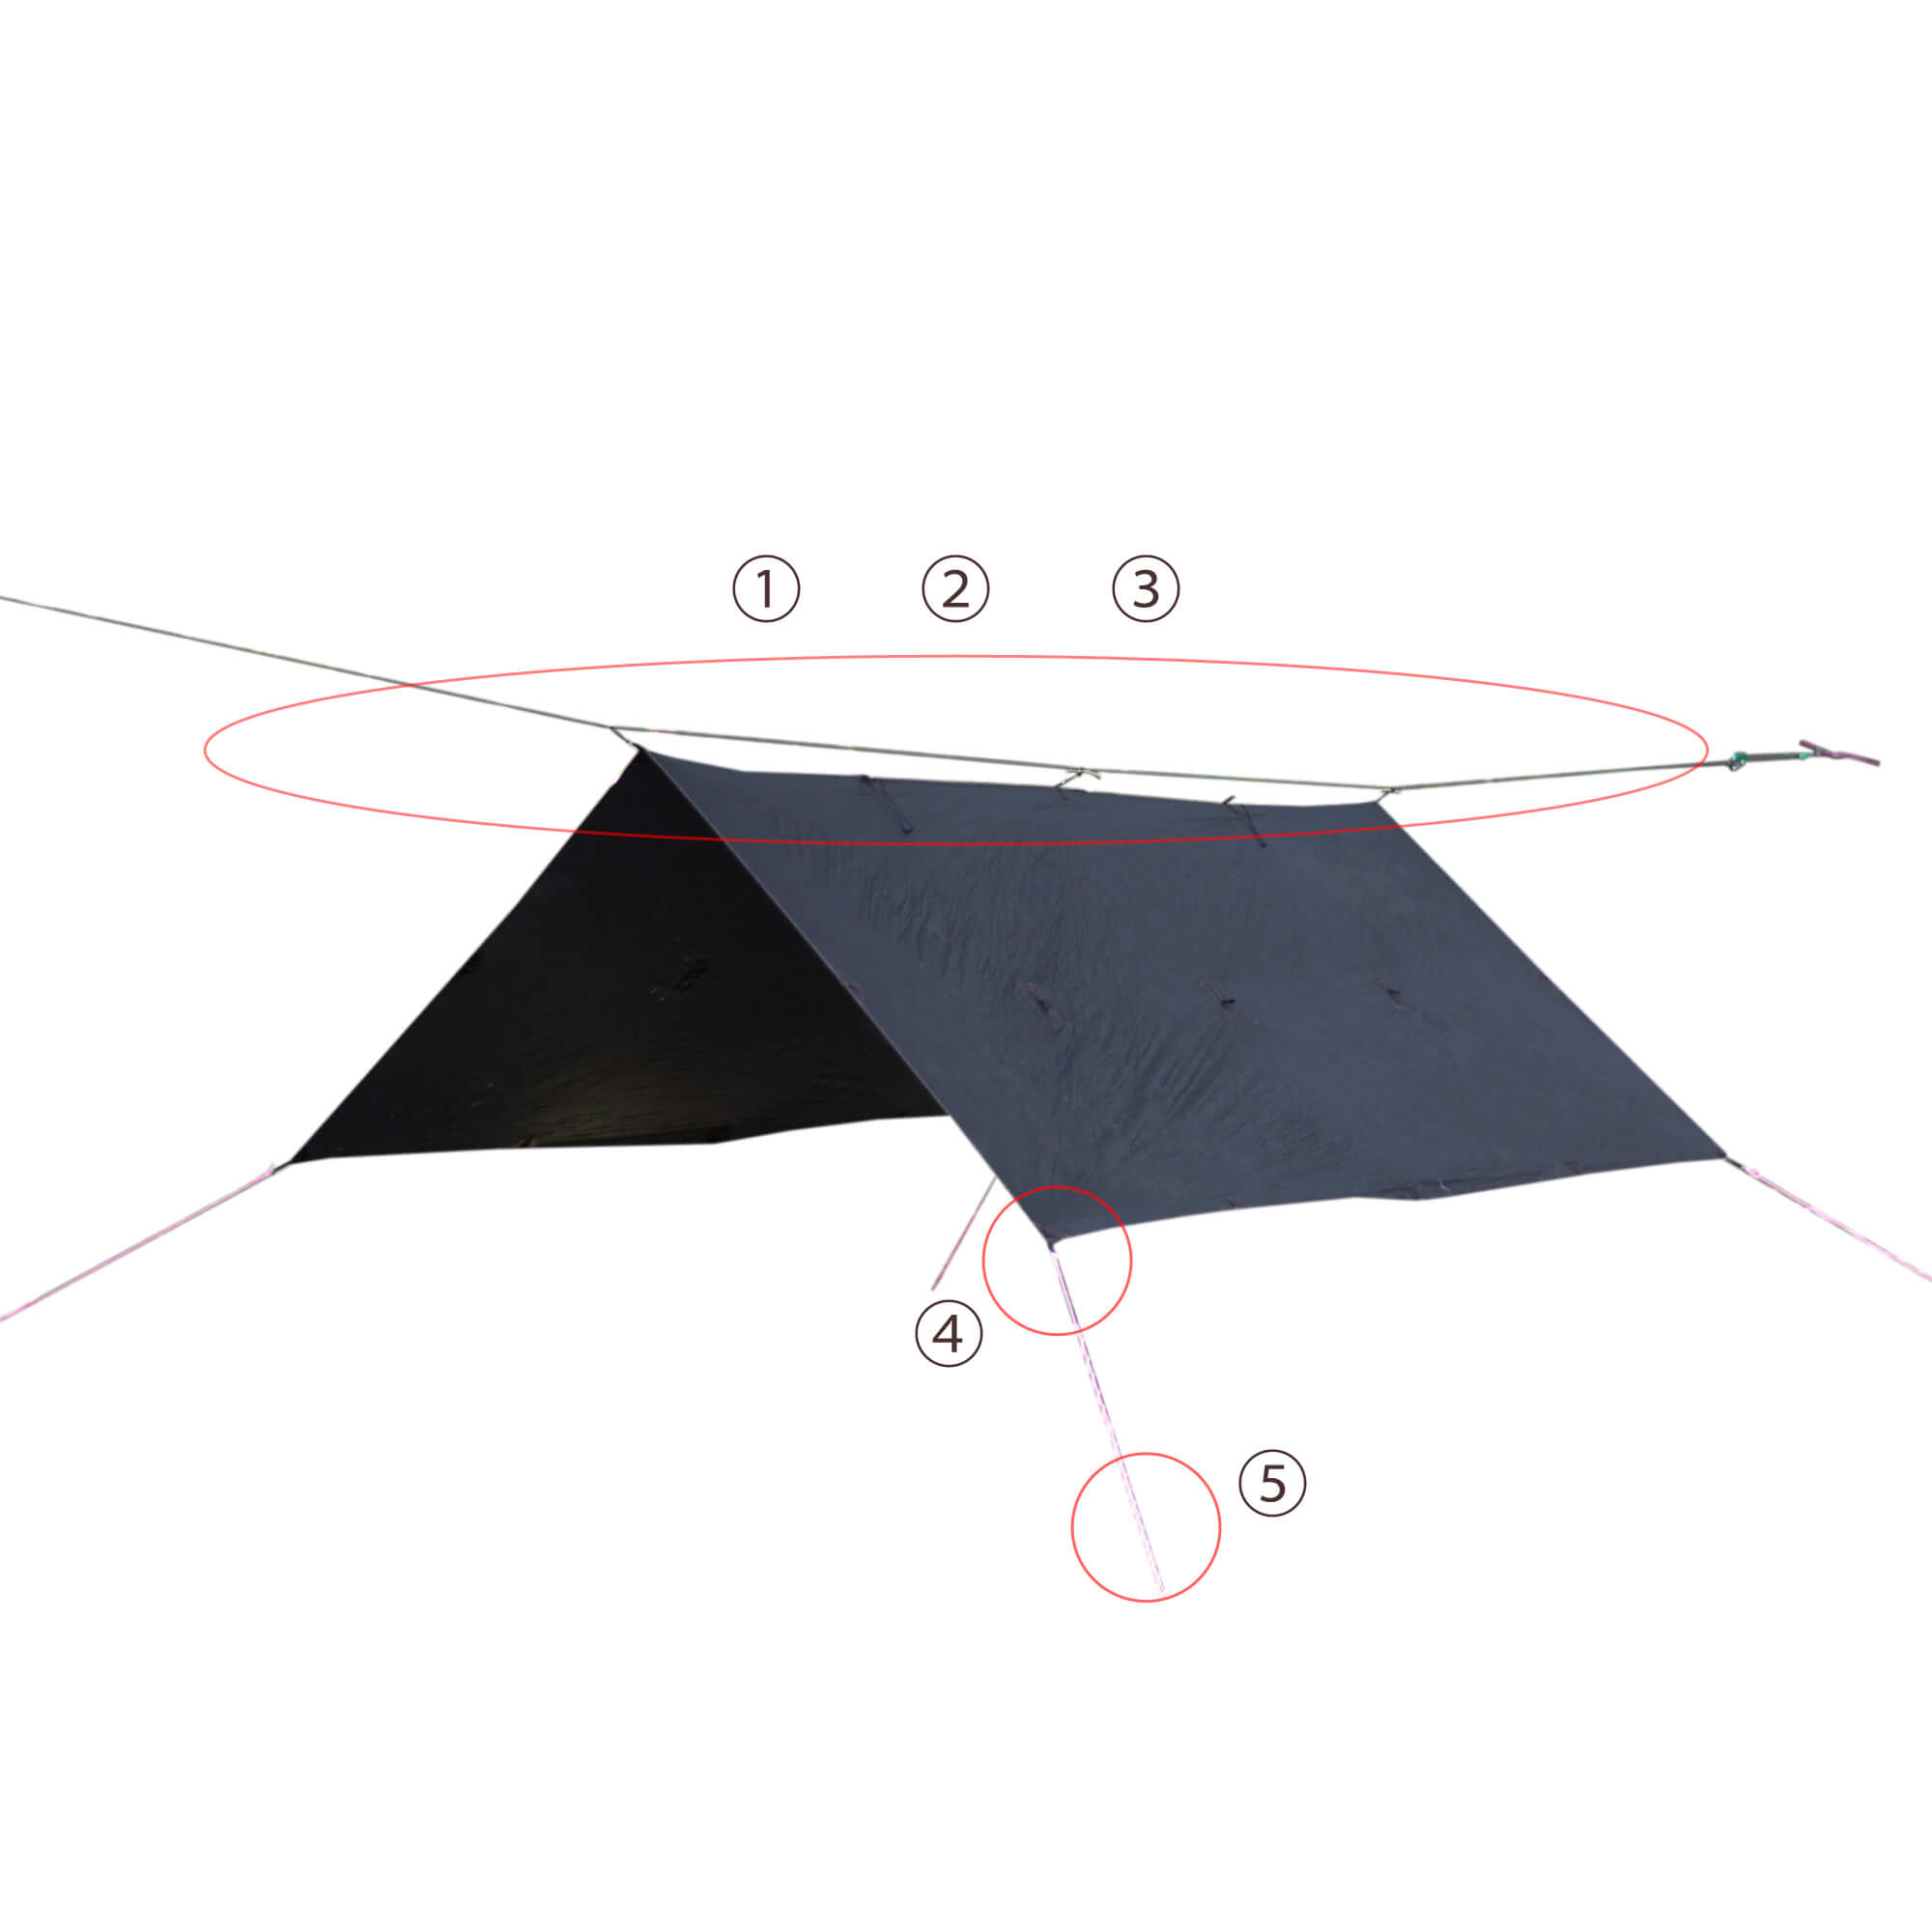 |
1. Secure the tree to the anchor using an Evans knot or a clove hitch. Be careful, as the clove hitch is difficult to use on thick trunks and thin ropes. 2. Use a trucker's hitch to tension the ridgeline. Since the ORIGAMI TARP is light, use a thin rope such as 550 Fire Cord for 3 times tension. For heavy tarps such as campfire tarps, it is best to use a rope that is 5mm or more and does not stretch easily, and use 5 times tension. 3. Use a toggle friction hitch to secure the tarp to the ridge line. When using tarps made by other companies, the general method is to make your own loop with a double fisherman's knot, attach a prusik to the ridge line, and connect it to the loop on the tarp with a toggle hitch. 4. Tie the guy lines together with an Evans knot. 5. A tote line hitch is ideal for pegging down and adjusting the tension, but the guy lines provided come with adjustable hooks, so if that's all you need, you don't need to use ropework. See here for a list of rope tying methods . |
Setting up a wing tarp

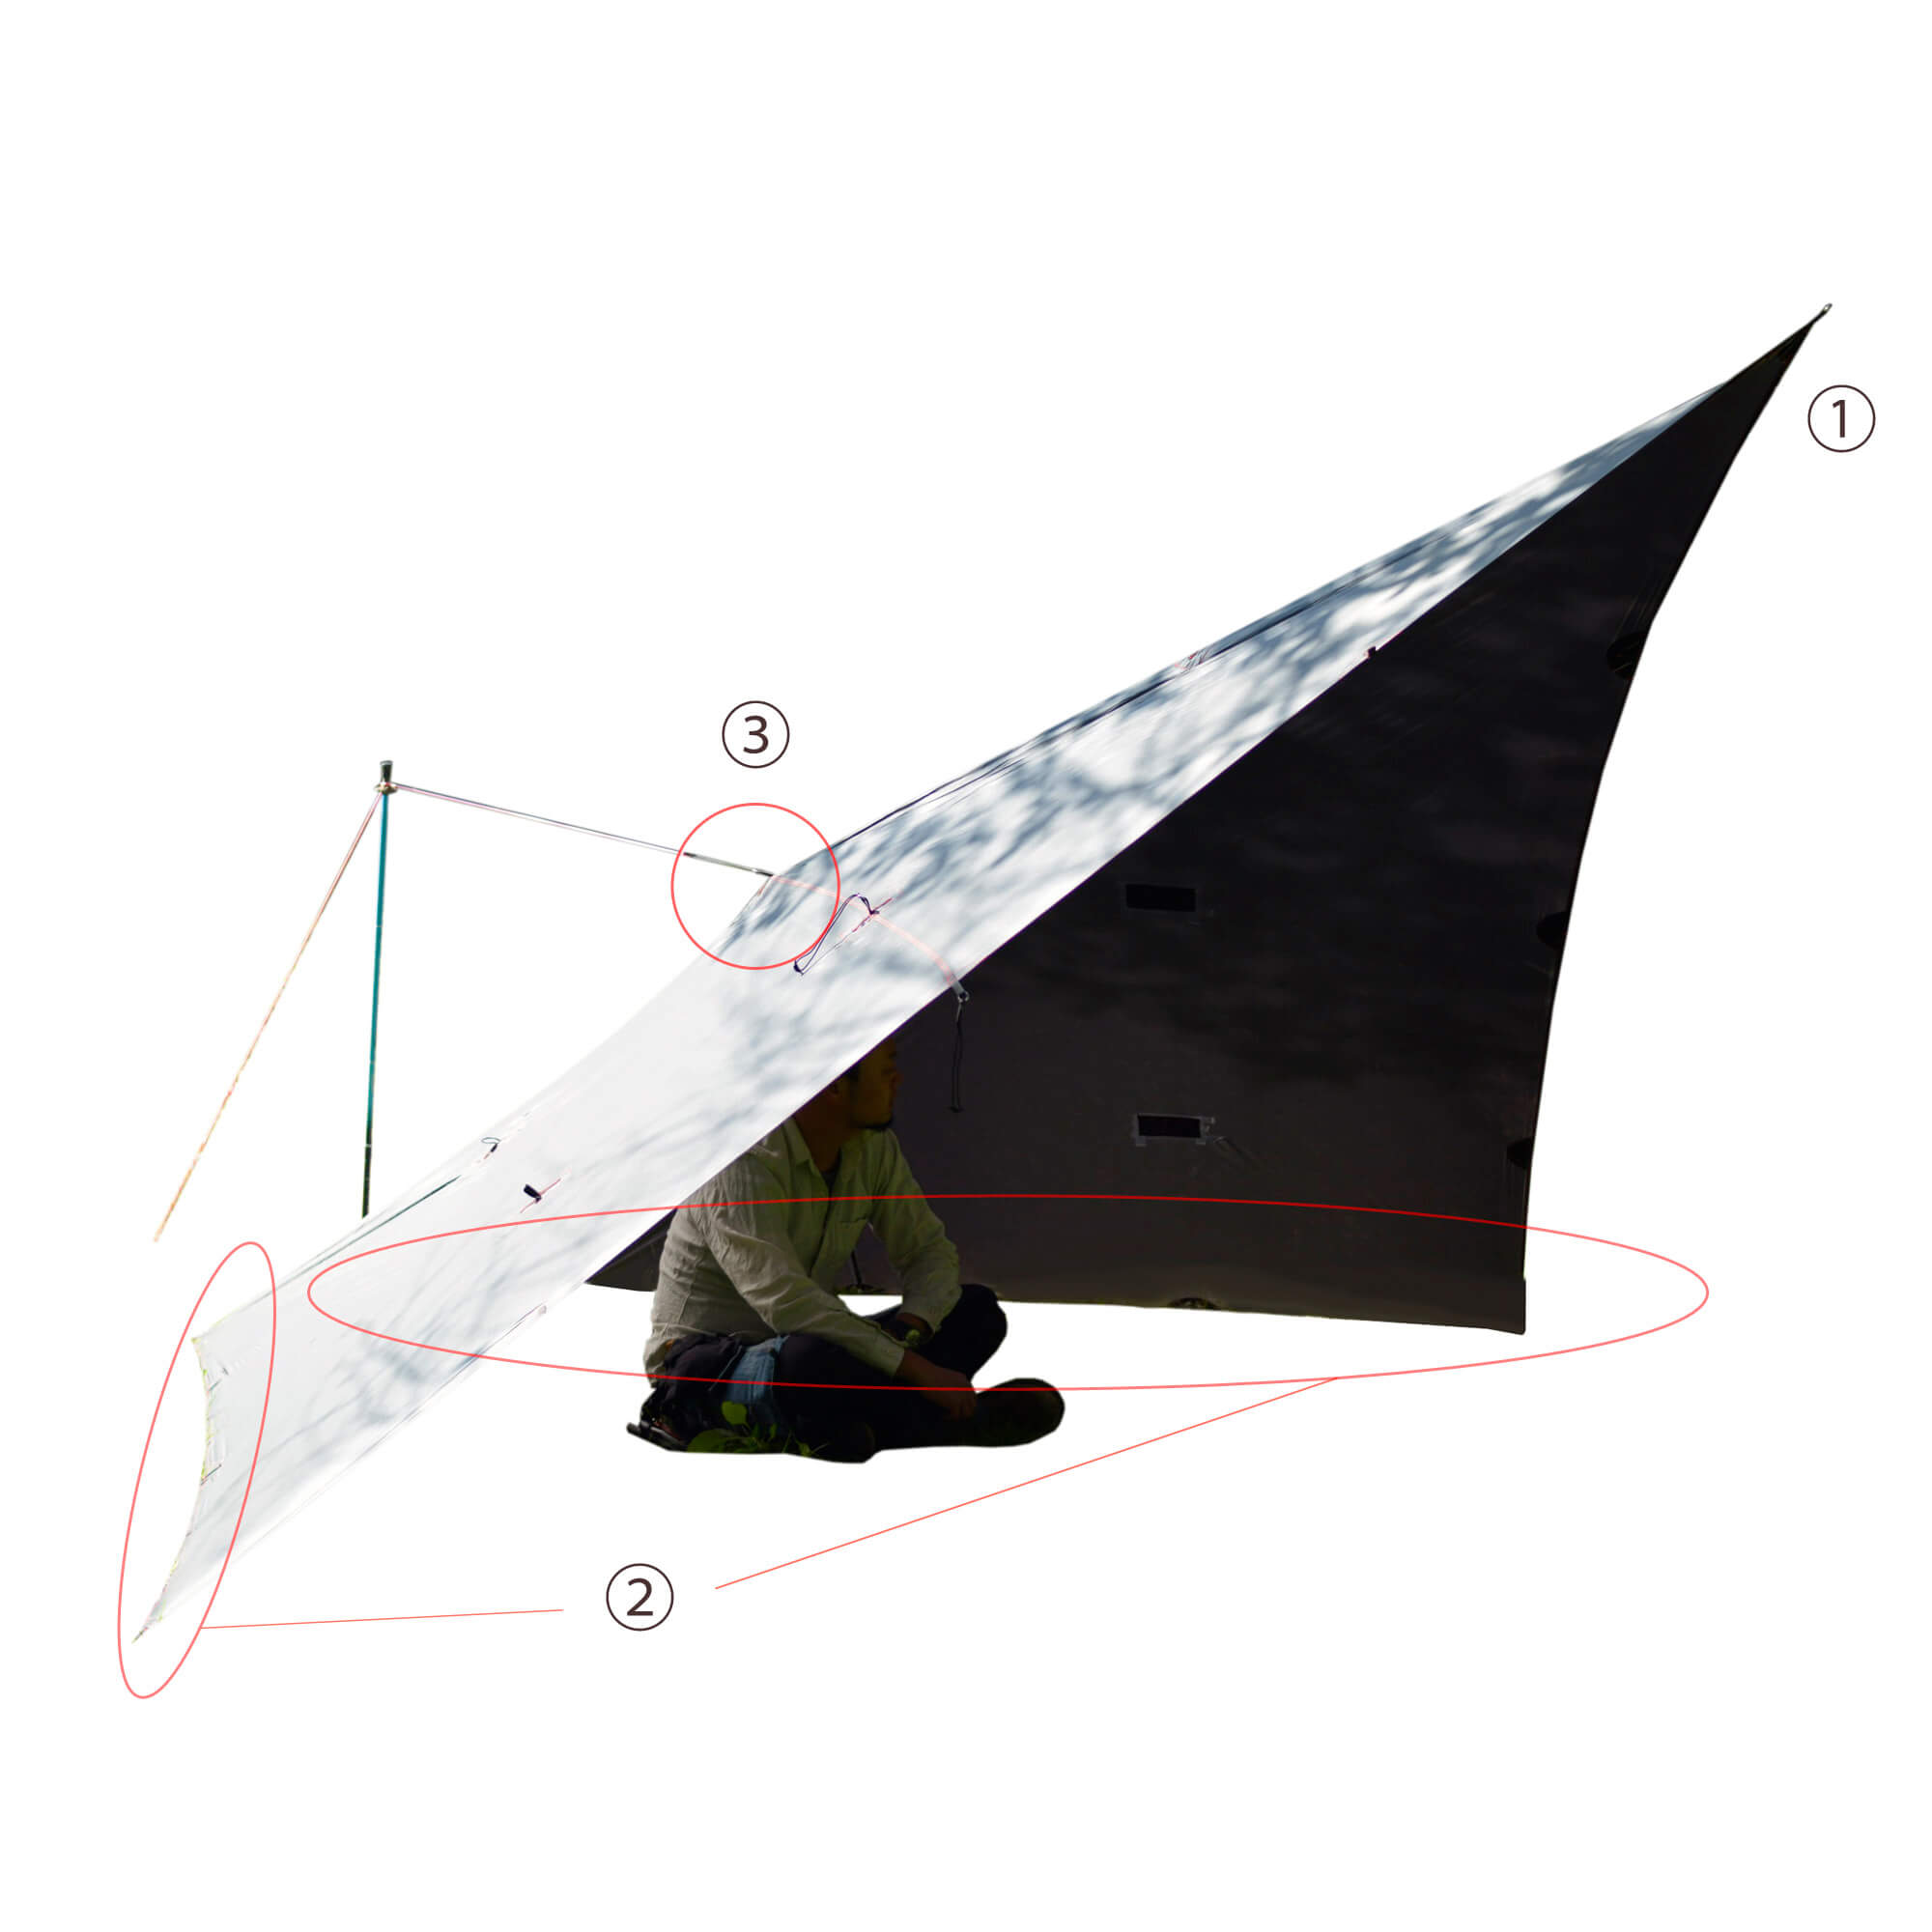
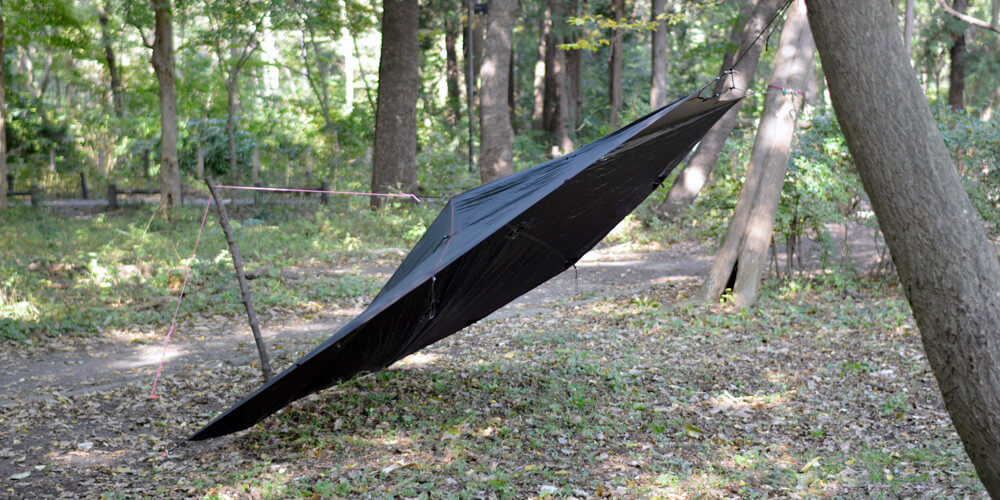
This is a wing-type setup that is often used in conjunction with a hammock. It is basically the same as an A-frame, but since it requires fewer guy lines, it is relatively easy to set up. It also tends to be less affected by wind. It can also create a beautiful, free-hanging appearance, making it an excellent choice for hammock camping in good weather to strong winds. The wing-type has the disadvantage that its effective surface area against the weather is not very large, making it difficult to protect against both sunlight and rain on the ground. It is vulnerable to rain blowing in, so care should be taken.
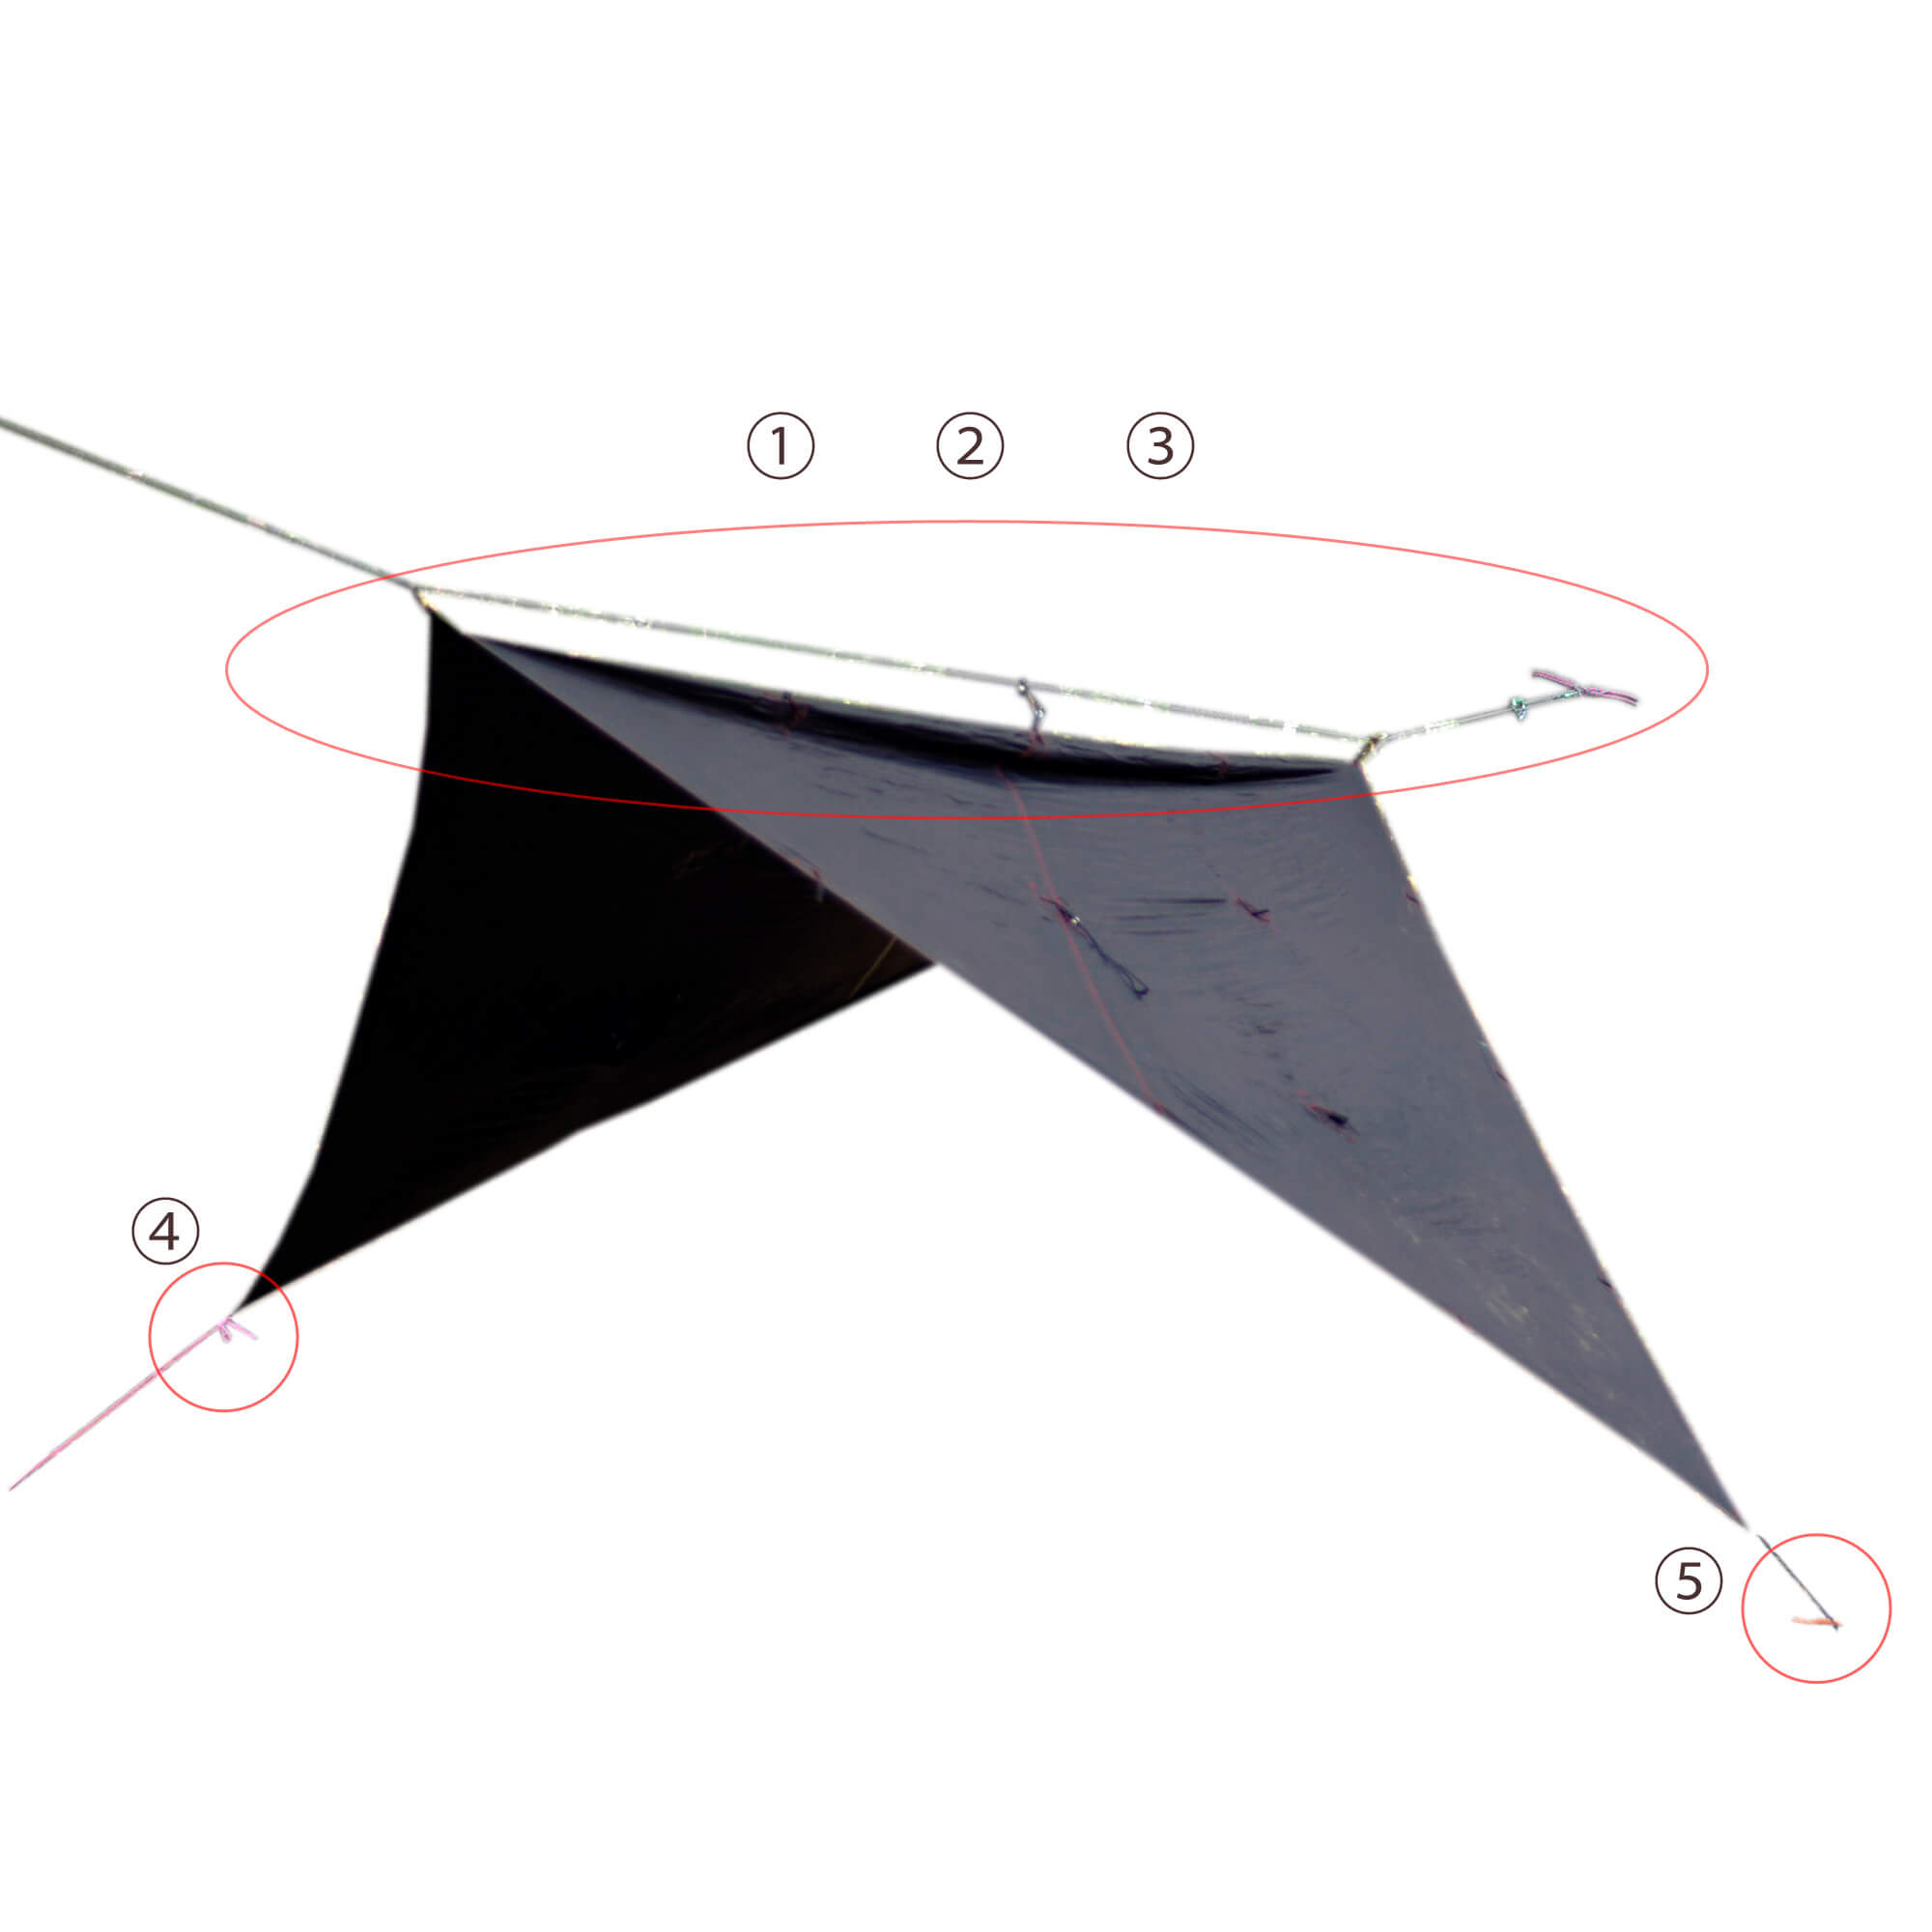 |
1. Fix the rope to the anchor using an Evans knot or a clove hitch. Be careful, as the clove hitch is difficult to use on thick trunks and thin ropes. 2. Use a trucker's hitch to tension the ridgeline. Since the ORIGAMI TARP is light, use a thin rope such as 550 Fire Cord for 3 times tension. For heavy tarps such as campfire tarps, it is best to use a rope that is 5mm or more and does not stretch easily, and use 5 times tension. 3. Use a toggle friction hitch to secure the tarp to the ridge line. When using tarps made by other companies, the general method is to make your own loop with a double fisherman's knot, attach a prusik to the ridge line, and connect it to the loop on the tarp with a toggle hitch. 4. Tie the guy lines together with an Evans knot. 5. A tote line hitch is ideal for pegging down and adjusting the tension, but the guy lines provided come with adjustable hooks, so if that's all you need, you don't need to use ropework. See here for a list of rope tying methods . |
Setting up a Closed A Tarp
Closed A is an advanced version of the A-frame. It provides high privacy and is resistant to bad weather. It is spacious enough for 1-2 adults to lie down. You can place your luggage at your feet with your feet facing the opening, and then roll up the ground sheet and place it over your luggage to prevent rain from getting in. It takes some getting used to adjusting the height when setting up, but it is a recommended setup method for users who want to use it like a tent.
 |
1. Fix the rope to the anchor using an Evans knot or a clove hitch. Be careful, as the clove hitch is difficult to use on thick trunks and thin ropes. 2. Use a trucker's hitch to tension the ridgeline. Since the ORIGAMI TARP is light, use a thin rope such as 550 Fire Cord for 3 times tension. For heavy tarps such as campfire tarps, it is best to use a rope that is 5mm or more and does not stretch easily, and use 5 times tension. 3. Use a toggle friction hitch to secure the tarp to the ridge line. When using tarps made by other companies, the general method is to make your own loop using a double fisherman's knot, attach a prusik to the ridge line, and connect it to the loop on the tarp with a toggle hitch. 4. Peg down directly to the ground. Peg down the two loops together at the points marked with an O. By driving the pegs in at an angle, you can prevent thin pegs such as bush nails from slipping out of the loops. Click here for a list of rope knots |
Setting up the Ground Lean Two Tarp
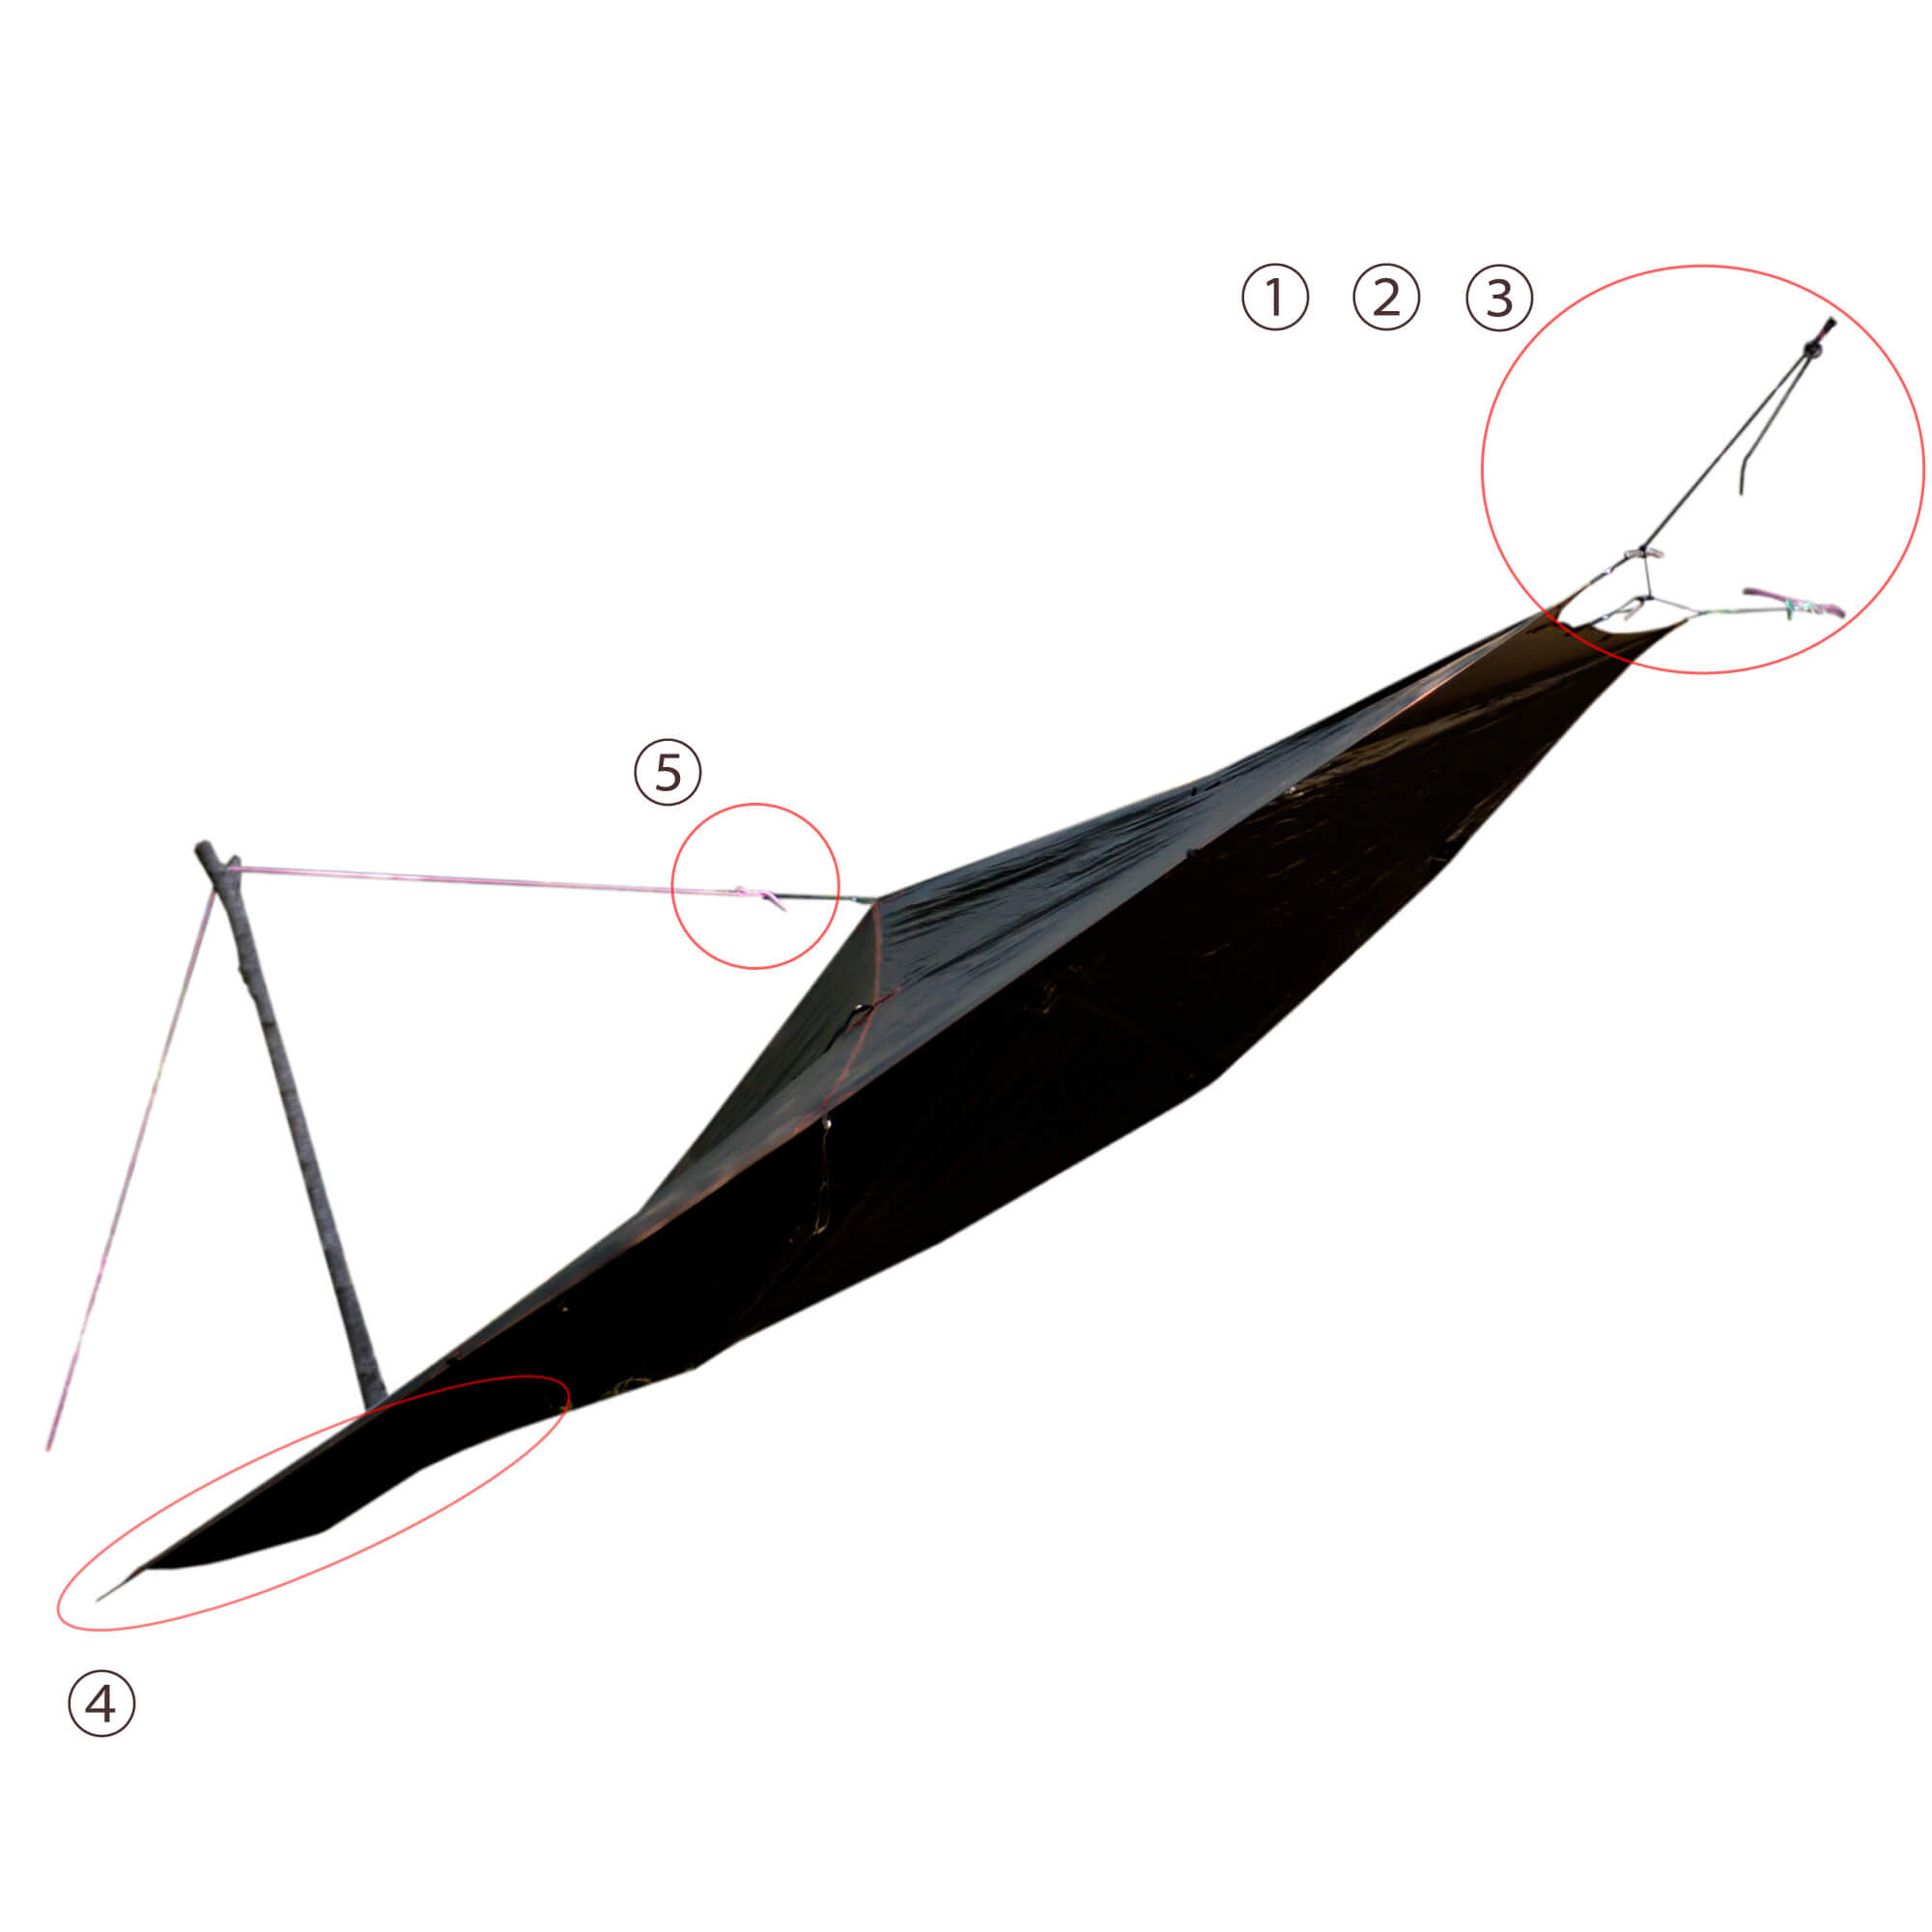
It's an easy setup method that can be used for a wide range of purposes, from short breaks to camping. It also doubles as a ground sheet, so you can take just one ORIGAMI TARP with you on a day hike or picnic.
 |
1. Fix the rope to the anchor using an Evans knot or a clove hitch. Be careful, as the clove hitch is difficult to use on a thick trunk and a thin rope. 2. Use a trucker's hitch to tension the ridgeline. Since the ORIGAMI TARP is light, use a thin rope such as 550 Fire Cord for 3 times tension. For heavy tarps such as campfire tarps, it is best to use a rope that is 5mm or more and does not stretch easily, and use 5 times tension. 3. Use a toggle friction hitch to secure the tarp to the ridge line. When using tarps made by other companies, the general method is to make your own loop using a double fisherman's knot, attach a prusik to the ridge line, and connect it to the loop on the tarp with a toggle hitch. 4. Peg it directly into the ground. 5. Tie the guy lines to the tarp with an Evans knot, and use a suitable pole (locally sourced or a trekking pole is fine) to hoist it above the horizontal to expand the space. Use a tautline hitch to adjust the tension. Click here for a list of rope tying methods . |
Setting up the Diamond Tarp
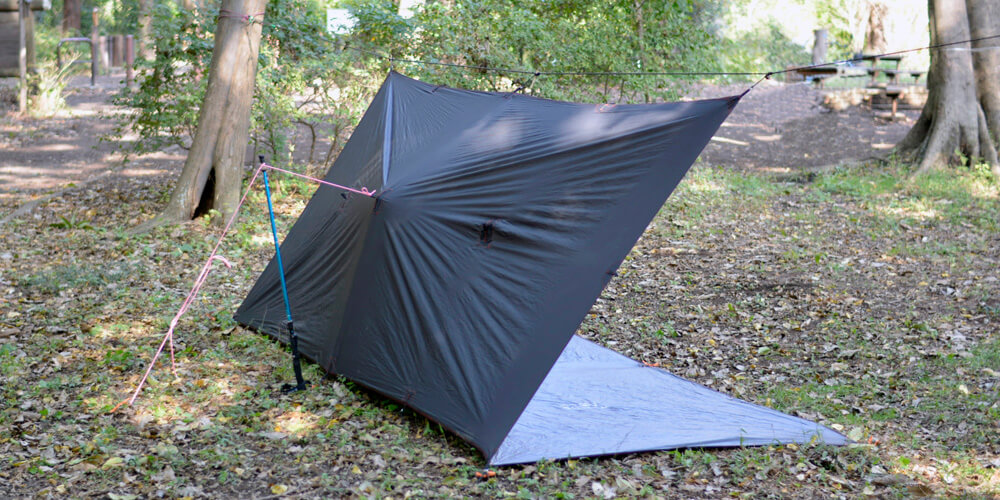
This is an easy setup method that can be used for a wide range of purposes, from short breaks to camping. This is the standard setup for square tarps, and is the easiest to set up, whether pole or hanging. It is not very effective against bad weather in the Japanese environment, but it is very good at blocking the sun. If you face the back to the south, the area inside the triangle that touches the ground will be protected from the sun all day, and there is no need to change the setup depending on the time of day. This is the first thing beginners should try at a summer campsite. This is the basic form that makes it clear at a glance that you are a serious bushcrafter who uses square tarps.
 |
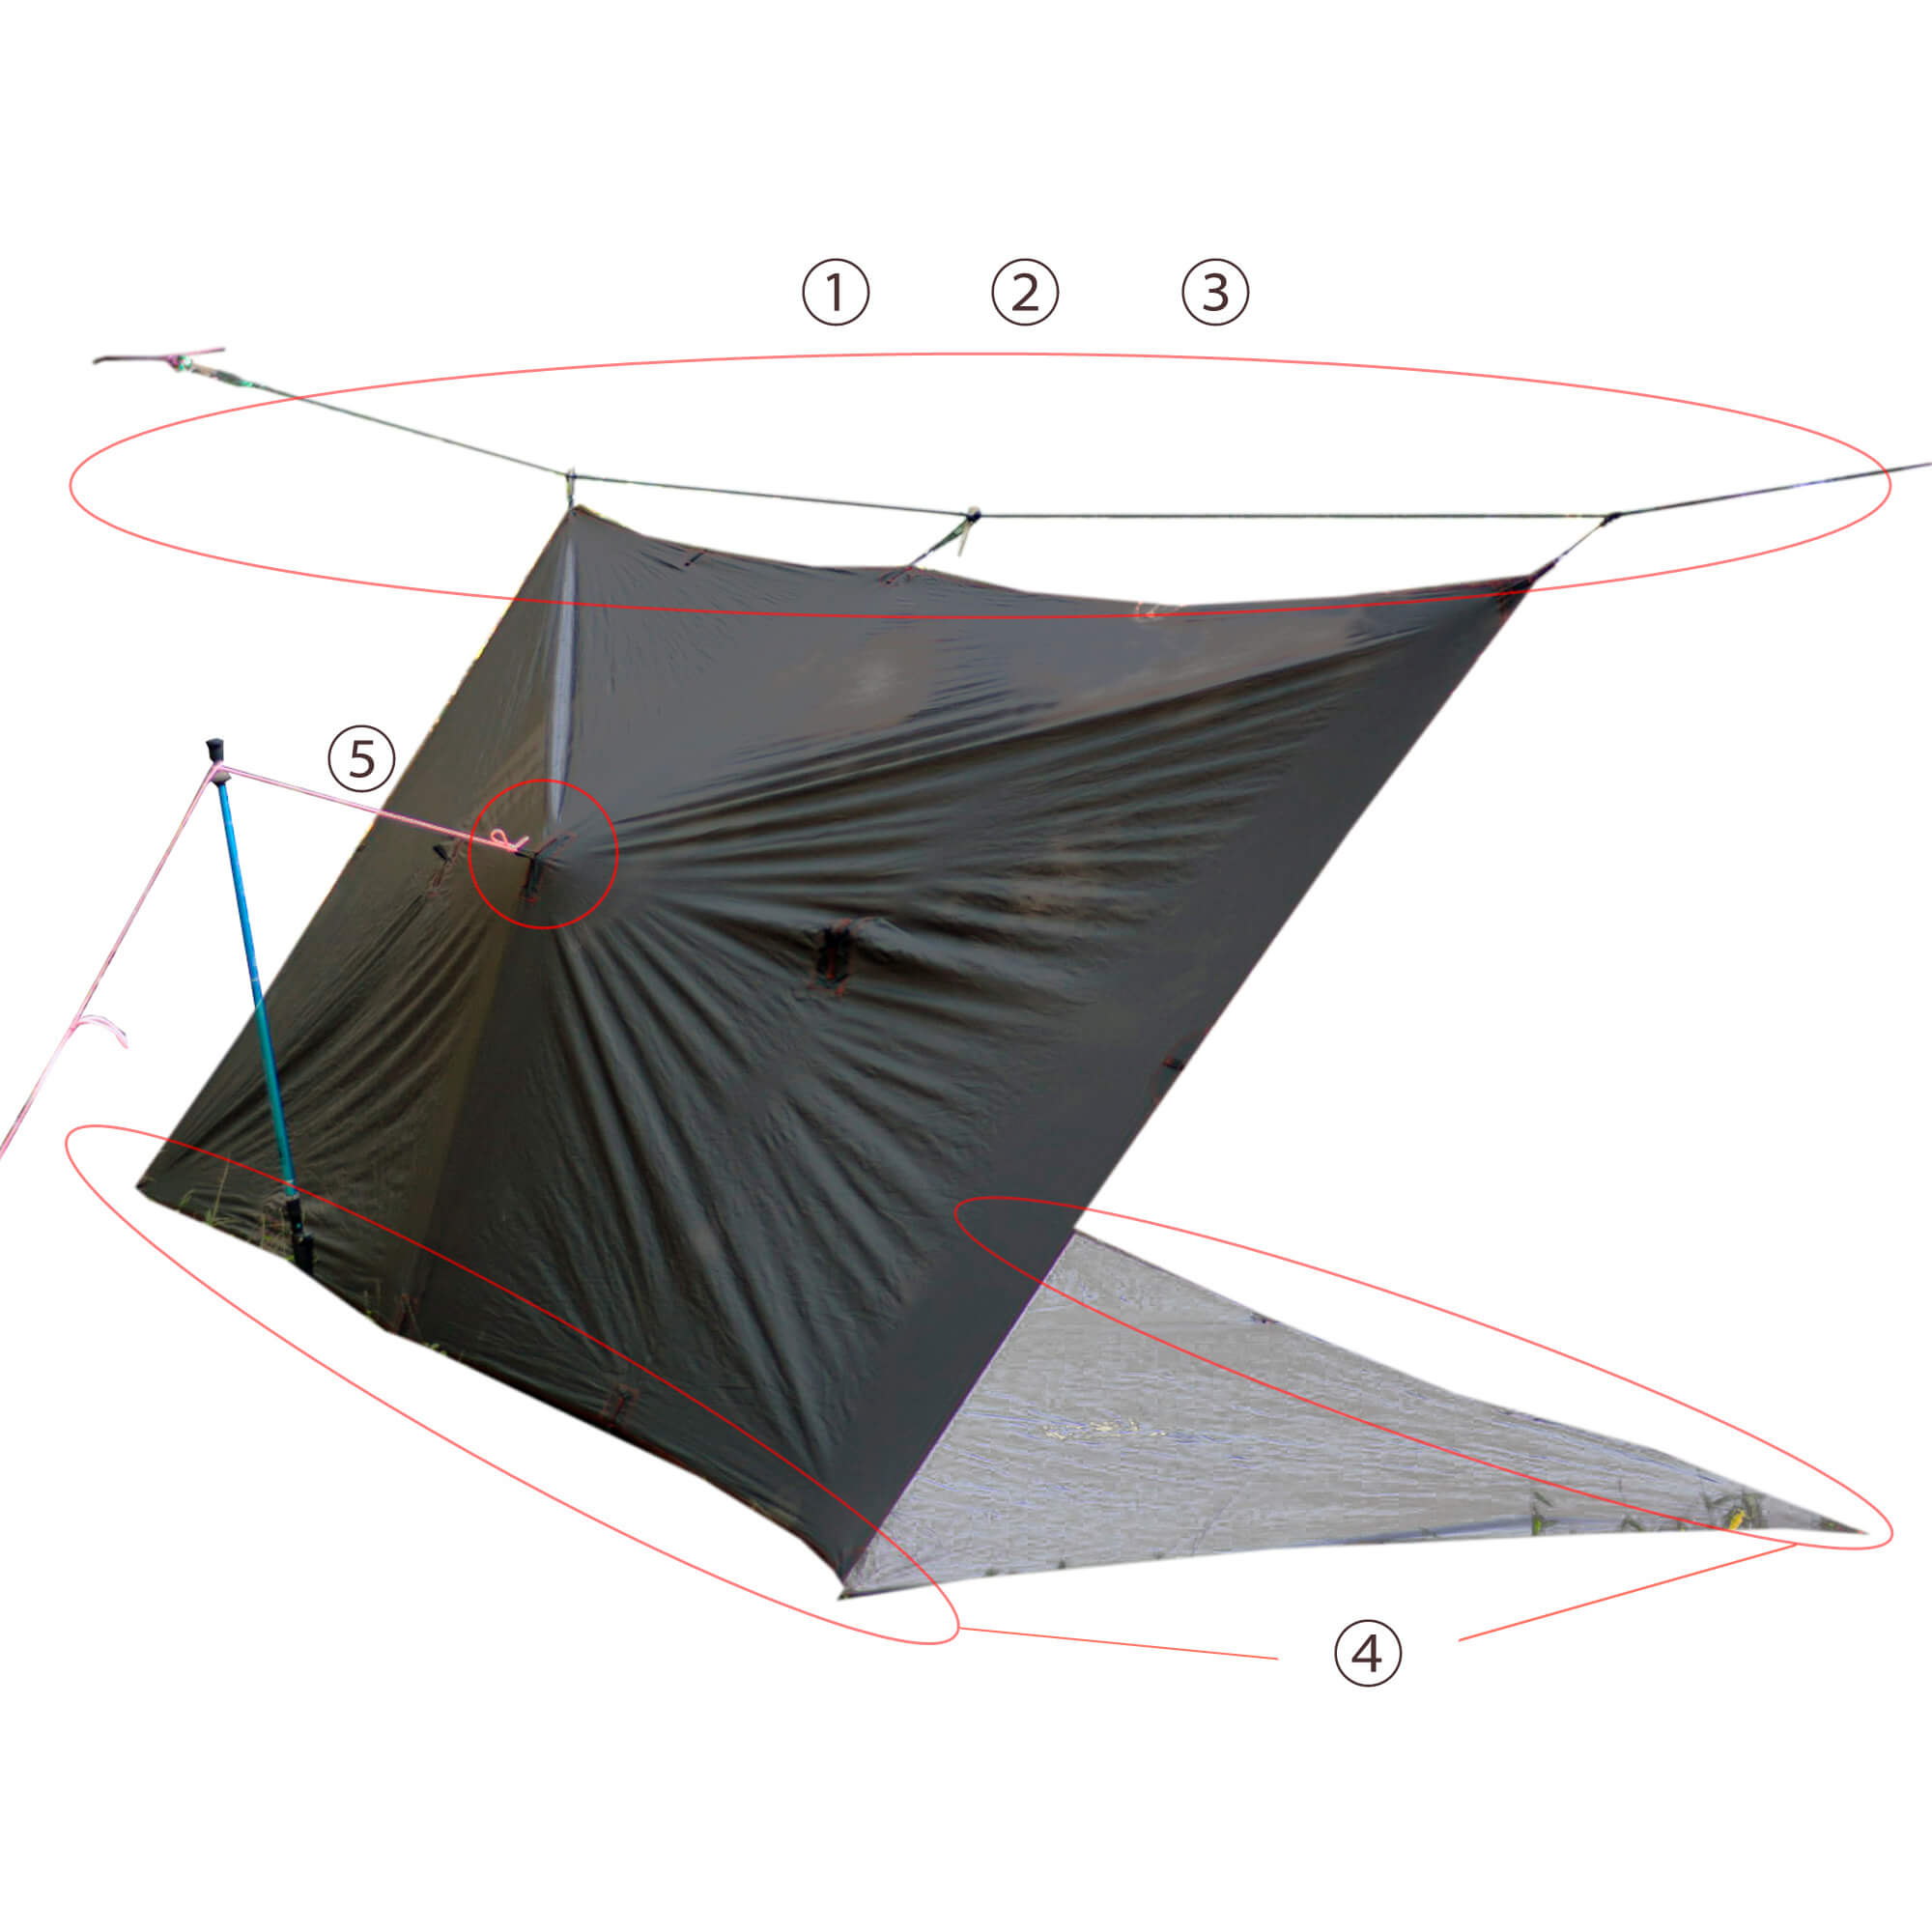
1. Tie a guy line to the top with an Evans knot, and anchor it to the ground or trunk through a tree branch. Setting up is easier if you can adjust the length with a tote line hitch. The diamond-shaped top is difficult to use the included guy line due to its height. It is better to use 550 Fire Cord or similar. If you use poles, use ones about 180cm to 200cm long for good balance. 2. Peg it directly into the ground. 3. Tie the tarp in the center with an Evans knot, then tie it to a stick or a standing tree and pull it to expand the space. It is convenient to be able to adjust the tension with a tote line hitch. Click here for a list of rope tying methods. |
Setting up the Flat Lean Two Tarp
It can be easily set up with either poles or ridgelines. In particular, the ridgeline is so easy that you can set it up without thinking if you have mastered ropework. It is best used mainly as a sunshade in the Japanese environment, and it is easy to imagine using it together with chairs and tables.
 |
1. Fix the rope to the anchor using an Evans knot or a clove hitch. Be careful, as the clove hitch is difficult to use on thick trunks and thin ropes. 2. Use a trucker's hitch to tension the ridgeline. Since the ORIGAMI TARP is light, use a thin rope such as 550 Fire Cord for 3 times tension. For heavy tarps such as campfire tarps, it is best to use a rope that is 5mm or more and does not stretch easily, and use 5 times tension. 3. Use a toggle friction hitch to secure the tarp to the ridge line. When using tarps made by other companies, the general method is to make your own loop using a double fisherman's knot, attach a prusik to the ridge line, and connect it to the loop on the tarp with a toggle hitch. 4. Peg it directly into the ground. 5. Tie the guy lines to the tarp with an Evans knot, and use a suitable pole (a trekking pole is fine, or you can procure one locally) to suspend the guy lines above the horizontal to expand the space. The tension can be adjusted with a tote line hitch. See here for a list of rope tying methods . |